Smoothly Transition from Toggl to TrackingTime: Step-by-Step Guide
As your team grows and your projects become more complex, you might find Toggl falling short—the lack of detailed reporting, limited team features, or the need for a more robust workflow. That’s where TrackingTime comes in.
Toggl Alternative
Switching tools may seem daunting, but it doesn’t have to be. In this guide, we’ll walk you through exactly how to transition from Toggl to TrackingTime step by step. You’ll discover how to migrate your data, adapt your team to the new workflow, and unlock powerful features that give you better visibility and control over your time.
Let’s make your switch smooth, fast, and worth it.
Acknowledge Toggl’s Impact
First off, Toggl is a great product that has been around since the early days of tracking software when most people didn’t even know what time tracking was. As one of the pioneering products in this space, Toggl has played a crucial role in introducing users to the benefits of modern time-tracking solutions.
Why Some Users Switch to a Toggl Alternative
However, as businesses evolve, their software needs to change. Users often find themselves outgrowing Toggl, citing issues such as rising subscription costs, limited customer support, infrequent feature updates, and missing essential capabilities for growing teams. This is where TrackingTime steps in, offering a powerful yet easy-to-use alternative tailored for today’s collaborative and dynamic work environments.
If Toggl no longer meets your team’s requirements, it might be the perfect moment to explore TrackingTime. Our platform offers comprehensive reporting, seamless integrations with popular project management tools, responsive customer support, and flexible pricing designed to scale with your business.
Effortless Data Migration
To start with, one major concern when switching platforms is data migration. Rest assured, migrating your team’s hours from Toggl to TrackingTime is incredibly simple and hassle-free. Here’s how you do it:
Step 1: Export Your Toggl Data
First, log into your Toggl account and go to Reports > Detailed and select the time period you’d like to export. All hours tracked by all account users during the selected time range will be listed.
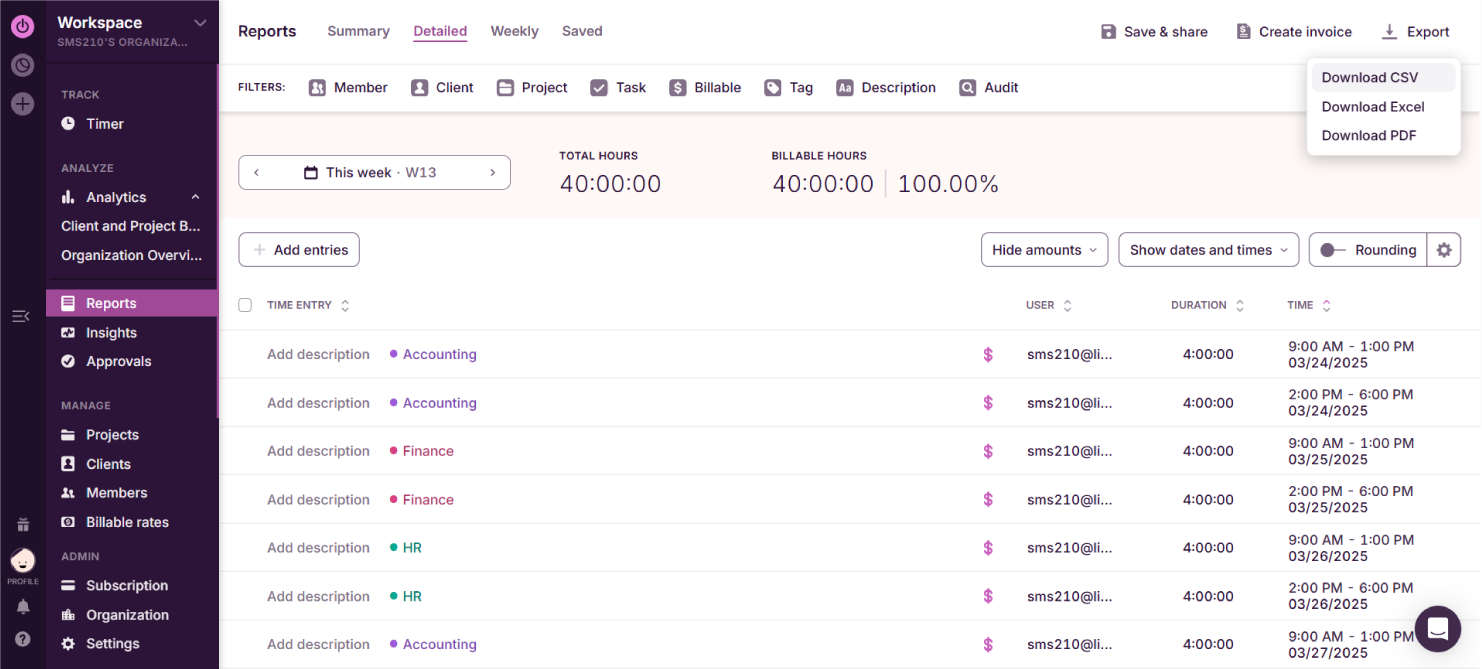
Then, select Export in CSV. The file is going to look something like this:

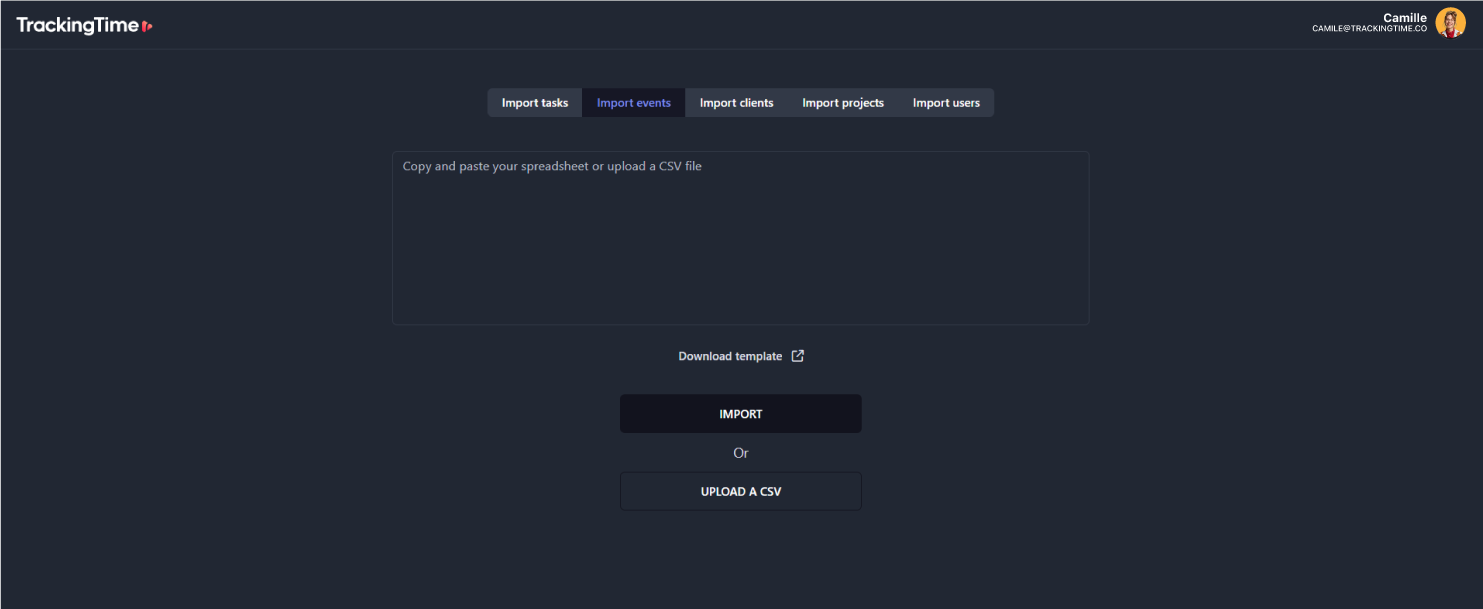
Step 2: Import Your Time Data to TrackingTime
Now you can just head over to your TrackingTime account and select Data Import. To access the Data Import page, open the Manage menu and scroll down to the Data Import section.

Then, upload the CSV file you just exported from Toggl.
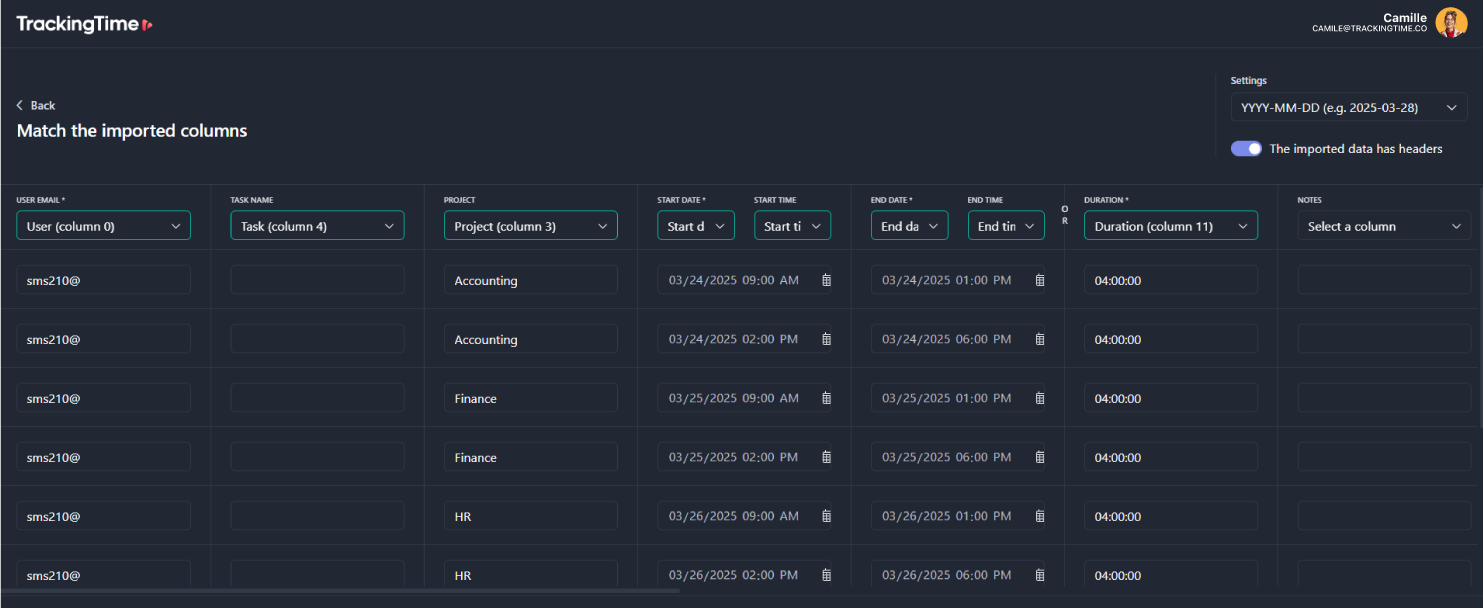
Match the columns of the file with the columns required by TrackingTime (e.g., task, start time).
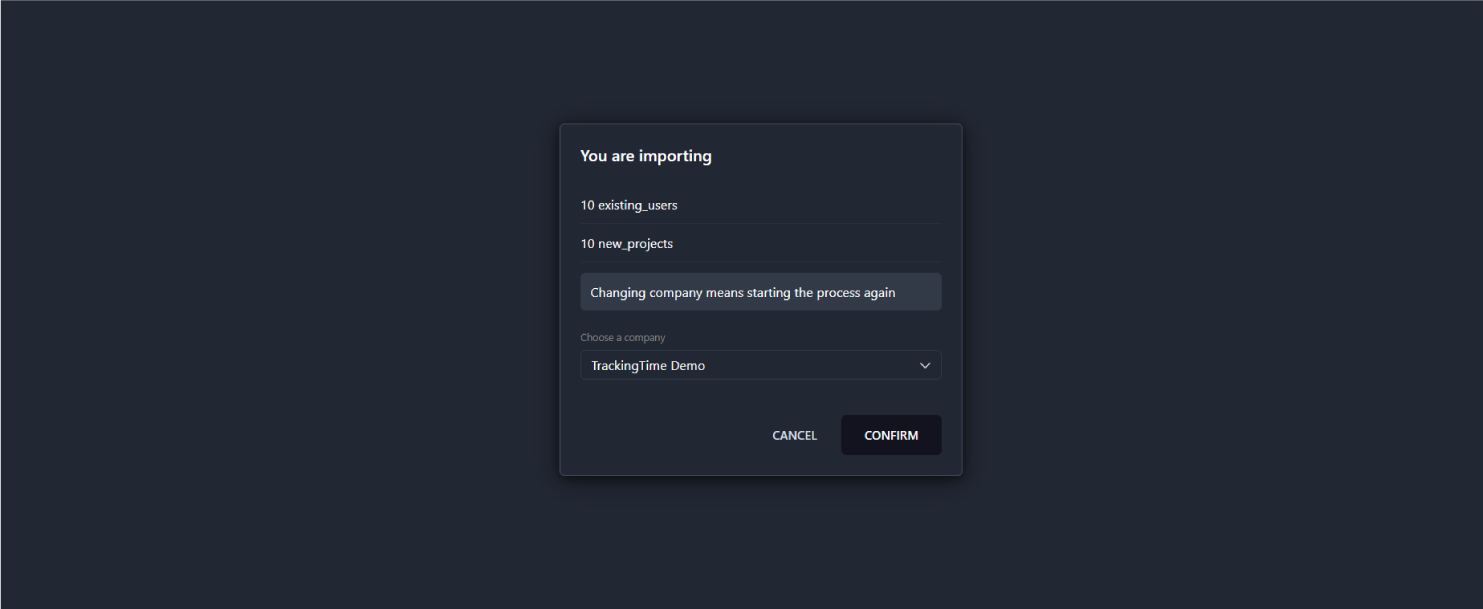
Finally, click on the Import button displayed at the bottom of the screen.
Review the overview of all time entries, tasks, projects, etc., to be imported. If everything looks good, click Confirm.
You’re all set! Your Toggl data is now on its way to your new TrackingTime account. Depending on how much you’re migrating, it should only take a few seconds to a couple of minutes. Now’s the time to take full advantage of what TrackingTime has to offer—from smart time tracking and detailed reports to seamless integrations and team-friendly features.
Need help along the way? Our support team is just a click away and ready to guide you through any step of the process.
Make the switch today and experience time tracking the way it should be: effortless, insightful, and built for the way you work.